
When you need to give a speech or present your project at a meeting, usually you'll present through a PowerPoint project which allows you to add words, table and graphics, pictures, audio and videos to make your presentation more vivid and persuasive. To add words, graphic and pictures is easy, but to add videos, especially AVCHD videos from camcorders like Canon, Panasonic, etc is not that easy since PowerPoint only supports video formats including .asf, .avi, .mp4, .m4v, .mov, .mpg, .swf, and .wmv. Then, how to embed AVCHD (MTS/M2TS) into PowerPoint? First of all, you need to convert AVCHD videos to PowerPoint supported video format, like MP4. To do the conversion, we recommend you the iOrgSoft AVCHD Video Converter (AVCHD Converter Mac). In the following paragraphs, you'll learn how to do the conversion with iOrgSoft AVCHD Converter and how to insert the converted AVCHD videos to PowerPoint.

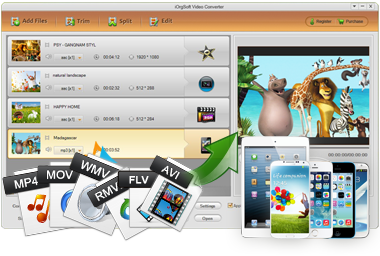
iOrgSoft AVCHD Video Converter allows you to convert AVCHD (MTS/M2TS) files from camcorders to other commonly used video formats like MP4, AVI, WMV, etc for use in Microsoft PowerPoint.
Secure Download
Secure Download
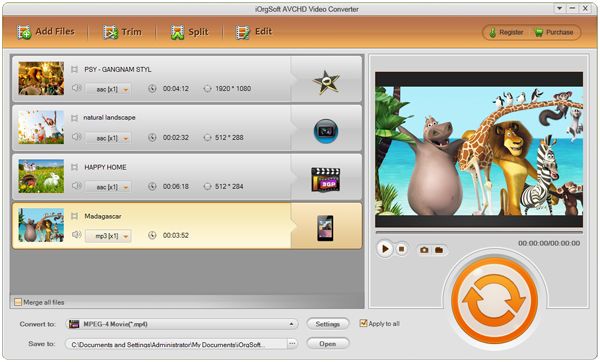
To add AVCHD video, drag and drop your native AVCHD videos to the program. Alternatively, you can click the "Add Files" button to choose AVCHD files.
The program allows you to add several AVCHD files at one time and convert them in batch. Additionally, if you want to merge several files into one, please tick the "Merge" box.

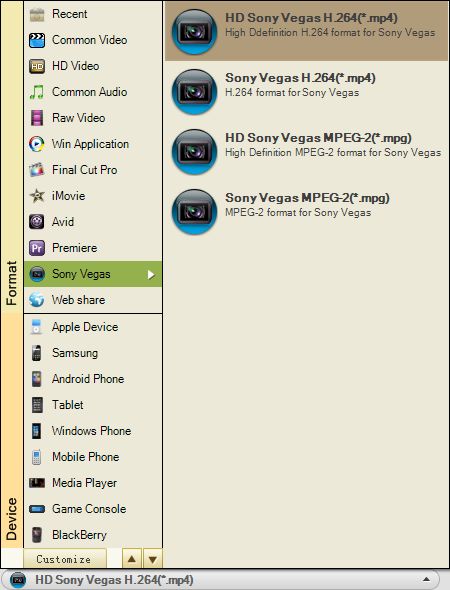
Click the "Profile" menu which leads to an output format list. There you'll find many options for output formats. For the best video playback experience, we recommend that you use .mp4 videos encoded with H.264 video in PowerPoint. Please choose MP4 format from "Common Video" category.
Please note that iOrgSoft AVCHD Video Converter has built in presets for various devices, that's to say, you just need to choose your device model from the device name if you want to convert the AVCHD videos for playback on your portable devices or other applications.
After choosing the suitable video output format, you are allowed to adjust the video frame rate, bit rate, resolution and audio sample rate, bit rate, and channels by clicking the "Settings" button.
After that, if needed, you can change the default output path from the "Save to" option menu to locate your converted files. Make sure the location you selected offers enough free space to save your output files. Or the conversion won't be completed successfully.

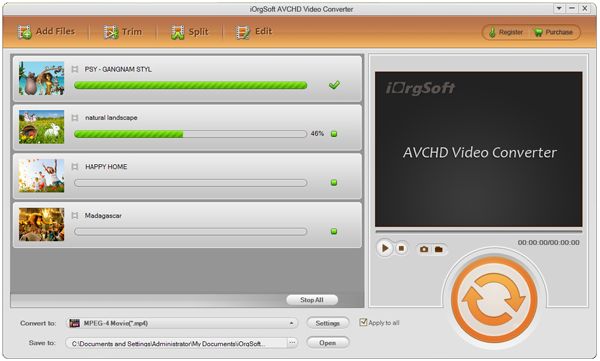
Click the conversion icon button to start the conversion. And the program will take care of the rest. Of course you can monitor the conversion progress from the progress bar. When completes successfully, the converted videos will work perfectly with PowerPoint perfectly.

Secure Download
Secure Download
After converting AVCHD to MP4 supported by PowerPoint, you can insert the converted AVCHD videos to PowerPoint project following the steps below:
Open a PowerPoint project and more to the "Insert" menu. Navigate to "Movies and Sounds", and then click "Movie from File". In the "Insert Movie" dialog box, please choose the converted AVCHD video and then click "OK".
After you insert the converted AVCHD file, a message box will pop up to ask you to choose when the inserted video will play. If you want it to play automatically when the slide is displayed in a slide show, you need to click the "Audtomatically" button; if you want it to play only after you click the video image, please click the "When Cliked" button.
If necessary, you are allowed to resize the video image. To resize video image, you can choose the video in the slide and then drag the sizing handles displayed around the image.
Drag one of the corner sizing handles to keep original proportions of the image. Drag one of the sizing handles in the center of a border to alter the original propotions. To resize it symmetrically about the center, please press CTRL while dragging a sizing handle. If you want to move it, you just need to drag it to a new location.
Firstly, right click the video image in your slide. And then follow the the below:
Click "Edit Movie Object" on the shortcut menu to adjust the volume and choose the video display options.
Click "Custom Animation" on the shortcut menu to modify the way the video plays during a slide show. Use teh controls in the "Custom Animation" task pane.
Click "Action Settings" on the shortcut menu to control the action that happens when you click the video image.
Click "Play Movie" to preview the inserted video.


Terms & Conditions| Privacy| Sitemap| Contact Us| About Us| Affiliate| Newsletter| License Agreement| Uninstall
Browser compatibility : IE/Firefox/Chrome/Opera/Safari/Maxthon/Netscape
Copyright © 2007-2016 iOrgsoft Studio All Rights Reserved